In this guide, we’ll show you how to print 1099-MISC forms in QuickBooks Desktop and QuickBooks Online. We’ve also included a 1099 Printing FAQ with quick fixes to common issues at the bottom of this guide.
Quick links
- How to Print 1099-MISC Forms in QuickBooks Online
- How to Print 1099-MISC Forms in QuickBooks Desktop
- 1099-MISC Printing FAQ: Quick Fixes to Common Issues
The 1099 form is a collection of tax forms used to report financial transactions made by an individual or a business entity that isn’t your employer. The primary objective here is to document the different types of income a taxpayer has earned throughout the year.
But that’s not all there is to it.
You have to be up to date with the different variations of Form 1099. Here are a few instances where you might use this form:
- You’ll receive a Form 1099-NEC if you earned $600 or more in non-employee compensation from an individual or business that isn’t your employer.
- You'll receive a Form 1099-MISC if you earned $600 or more in rent or royalty payments.
- You’ll receive a Form 1099-G if you receive a state or local tax refund during the previous year.
If you’re wondering whether you should be sending anyone a Form 1099, think about whether you paid an independent contractor, a freelancer, or any other non-employee a sum amounting to $600 or more during the year.
Now that you know where you stand, let’s get to the matter at hand.
 Beginning with tax year 2020, nonemployee compensation will no longer be reported in Box 7 of the 1099-MISC form. Instead, all nonemployee compensation must now be reported on a separate Form 1099-NEC. If you pay an independent contractor nonemployee compensation, you must separate nonemployee compensation payments from all of your other Form 1099-MISC payments.
How to print 1099 forms in QuickBooks Online
Below, we’ll cover the different steps involved in printing your 1099s in QuickBooks Online.
Note: We’re assuming you’ve added your contractors to the system. If you haven’t, you can find out how here.

Step 1: Prepare Your 1099s
Open your QuickBooks Online dashboard. In the sidebar, hover your mouse over Workers. Next, select Contractors from the fly-down menu.
A list of all your contractors will pop on your screen. Select Prepare 1099s, and follow the displayed prompts.
Once everything is accurate and finalized, click Finish Preparing 1099s. Your screen will then look like this:

As you’re filing by mail, select Print & Mail followed by I’ll File Myself.
QuickBooks Online may recommend purchasing a QuickBooks 1099 kit to proceed, but if you already have your forms, you can skip this step.
If you face any issues here—or get charged for a QuickBooks kit you don’t plan on buying—be sure to call QuickBooks support before processing your order.

Step 2: Check Print Alignment

Pre-printed 1099-MISC forms are precious cargo. Obviously, you don’t want to waste any of it. That’s why the next step is to print a blank-paper sample to check the print alignment.
Here’s how to go about this:
- Select 1099 form type from the Print 1099s
- After loading a blank paper into your printer, select Print a Sample on Blank Paper.
- When done, place the sample over a pre-printed 1099 form for accuracy. Hold them against the sunlight (or a lamp) to check whether your printed sample is lining up accurately.
If your sample aligns with your pre-printed 1099, select Yes, looks good!. If not, select No, it doesn’t line up. In case of the latter, you’ll need to:
- Use the Fine-Tune Alignment window to adjust alignment settings.
- Print another sample on black paper.
Finally, cross-check whether all the information aligns correctly with your pre-printed 1099. Repeat the above steps until you’re satisfied with the results.

Blue Summit Supplies Top Tip: Getting the alignment right takes time—a lot. The QuickBooks Wizard’s adjust alignment grid really needs an upgrade. Be sure to write down the alignment settings for next year (it was a Horizontal 9, Vertical -7, for us).

Step 3: Load and print your 1099s
At this stage, your 1099s are prepared and form alignment is set. Next, it’s time to load your pre-printed 1099-MISC forms and print out the forms.
We recommend printing each part of the form as a batch. This should look something like this:
- Load all COPY As first
- Print all COPY As
- Load all COPY Bs next
- Print all COPY Bs
Repeat this process for each of the 1099-MISC parts. When you load your forms into the printer, it should look something like this:

Congratulations! Your 1099s are printed.
Separate the forms as needed and mail them to the IRS, your contractors, and the state tax office. While you can send the payer copies in a batch to the IRS and state, the recipient copies must be sent to your contractors in compatible 1099-MISC tax form envelopes.
How to Print 1099 Forms in QuickBooks Desktop
Before we proceed, ensure your QuickBooks desktop account is set up correctly to avoid running into problems later. While we’ll discuss 1099 printing FAQs below, you can always contact QuickBooks customer support to fix issues.
Let’s take a quick look at the steps.
Step 1: Prepare Your 1099s
To prepare your 1099 forms, you simply have to follow the QuickBooks 1099 wizard. Here’s how to go about it:
- Click on File, followed by Print Forms and 1099s/1096. This will open the 1099 wizard.
- Next, select Get Started and follow the steps to finalize and double-check your info on the forms.
- Click Print 1099s in the Choose a filing method
- Specify the date range for the forms.
Full Disclosure: You’re likely to encounter several preparation issues, ranging from inaccurate 1099 information to non-display of information. The good news is the QuickBooks Wizard will flag any problems, as well as provide solutions, if your 1099 information doesn’t display correctly.
Step 2: Check Print Alignment
We recommend checking print alignment to avoid wasting any of your pre-printed 1099-MISC forms.
The best way to do this is to print a black-paper sample—just like we explained for QuickBooks Online.
- Select at least one contractor, and then choose Print
- After loading a blank paper into your printer, select Print a Sample on Blank Paper.
- When done, place the sample over a pre-printed 1099 form for accuracy. Hold them against the sunlight to check whether your printed sample is lining up accurately.
If the alignment is off, you’ll have to re-adjust the alignment settings. Here’s how to do it:
- Select Align in the Print
- In the Fine-Tune Alignment screen, use the alignment grid to estimate the required adjustment.
- Click Print Sample.
Repeat the above steps until you’re happy with the results.
Step 3: Load and print your 1099s
Finally, it’s time to load your pre-printed 1099-MISC forms and print out the hard copy.
Print out each part of the form as a batch. It’ll look something like:
- Load all COPY As first
- Print all COPY As
- Load all COPY Bs next
- Print all COPY Bs
The process is exactly similar to how we handled Step 3 in the case of QuickBooks Online.
When you load your forms into the printer, it should look like this:
Separate the forms as needed and mail them to the IRS, your contractors, and the state tax office. Don't forget to purchase the compatible 1099-MISC tax form envelopes when sending recipient copies to contractors.
1099-MISC Printing FAQs
Here are the most commonly asked questions we get from our customers when they’re learning how to print and file 1099-MISC forms in QuickBooks.
If you need help with a question that isn’t on this list, contact our support team and we’ll help you out.
Quick links
- Q1) What is the 1099-MISC filing deadline?
- Q2) Can I print my own 1099-MISC forms from the internet?
- Q3) Do I need special envelopes to mail 1099 forms?
- Q4) 3-Part, 4-Part, or 5-Part? Which 1099-MISC do I need?
- Q5) COPY A, COPY B, COPY C—who gets what?
- Q6) How do I print 1099s 2-up on a page?
- Q7) How to purchase pre-printed 1099-MISC forms online?
- Q8) Some of my contractors exceed the 1099 threshold, but they’re not appearing on my print 1099 information sheet. What do I do?
Q1) What is the 1099-MISC filing deadline?
The deadline to e-file or mail 1099-MISC forms to the IRS is January 31.
You must also mail copies of your 1099 forms to contractors by the same date.
Ensure 1099-MISC form envelopes are postmarked no later than January 31 to meet this submission deadline.
Q2) Can I print my own 1099-MISC forms from the internet?
Unfortunately, no. The IRS doesn’t accept laser-generated 1099s.
In fact, according to Publication 1179, you could be fined $50 for each laser-generated form you submit. This means you cannot download a PDF 1099 from the IRS website, print it out, and send it to the IRS.
You’ll need to use pre-printed 1099 forms designed for printers.
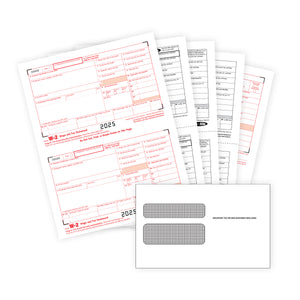
Q3) Do I need special envelopes to mail 1099 forms?
Yes! You’ll need 1099-MISC tax form envelopes to send 1099-MISC forms by mail. Check out this guide for more information: All About Tax Form Mailing: 1099 and W2 Envelopes.
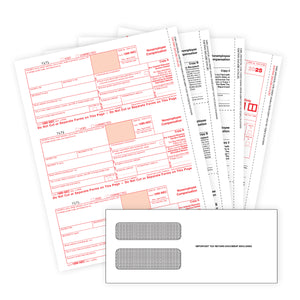
Q4) 3-Part, 4-Part, or 5-Part? Which 1099-MISC do I need?
The 1099-MISC is a multi-part form that comes in a set. Your state’s tax form requirements will determine which 1099-MISC forms you need to use.
Before you order pre-printed 1099-MISC forms online, ask your tax advisor to confirm how many “parts” your 1099-MISC forms will need.
Here’s what each 1099-MISC contains:
1099-MISC 3-Part Set
- Part 1: COPY A
- Part 2: COPY B
- Part 3: COPY C
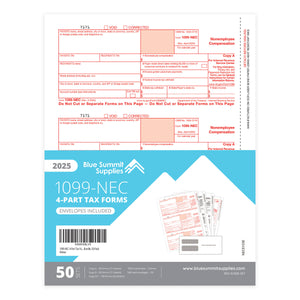
1099-MISC 4-Part Set
- Part 1: COPY A
- Part 2: COPY B
- Part 3: COPY C
- Part 4: COPY 1
1099-MISC 5-Part Set
- Part 1: COPY A
- Part 2: COPY B
- Part 3: COPY C
- Part 4: COPY 1
- Part 5: COPY 2
Q5) COPY A, COPY B, COPY C—who gets what?
Here’s where to send each part of the 1099-MISC:
- Copy A (red, scannable; has a 12” side perforation) is sent to the IRS
- Copy B is sent to the recipient (your contractor)
- Copy C is for your recordkeeping purposes
- Copy 1 is sent to your state tax department
- Copy 2 is for the recipient to file with their state income tax return
Even if you decide to e-file your 1099-MISC forms with the IRS, you’re still required to give your contractor (the recipient) a paper copy.
Your state’s tax requirements will determine how many 1099-MISC “parts” you need to prepare and file. If you’re unsure, check with your tax advisor before moving ahead with this process.
Q6) How do I print 1099s 2-up on a page?
If you print 1099's for more than one vendor at a time, QuickBooks will print 2 per page.
This is why you’ll want to load and print all of your COPY As first. Then load and print all of your COPY Bs, next. And so on.
Q7) How to purchase pre-printed 1099-MISC forms online?
You can purchase pre-printed 1099-MISC forms online at Blue Summit Supplies.
Even if you decide to e-file your 1099-MISC forms with the IRS, you’re still required to give your contractor (the recipient) a paper copy.
Your state’s tax requirements will determine how many 1099-MISC “parts” you need to prepare and file. If you’re unsure, check with your tax advisor before moving ahead with this process.
Q8) Some of my contractors exceed the 1099 threshold, but they’re not appearing on my print 1099 information sheet. What do I do?
This is slightly tricky. When this problem occurs, it usually means that there’s an error in the way your contractors and accounts have been set up in QuickBooks.
Here’s an explanation of how you can resolve this issue in QuickBooks Online and QuickBooks Desktop.
How to solve this issue in QuickBooks Online
According to the QuickBooks Support Team, there are three common reasons why contractors don’t show up when you’re attempting to print their 1099-MISC forms in QuickBooks Online.
1. The vendor payments were not set to be tracked under 1099.You can check and fix this in your vendor settings:
- Go to Expenses→ Vendors
- Click the contractor from the list of vendors
- Click Edit at the upper right corner
- Check if Track payments for 1099was selected at the bottom (it needs to be selected)
Here’s how to map the account:
- Go to Expenses→ Vendors
- Click Prepare 1099sat the upper right corner
- Select Continue your 1099s to reopen the 1099 Wizard
- Go to step 2 (Accounts)
- Select the account where the payments for the vendors are posted.
How to solve this issue in QuickBooks Desktop
We know this answer might sound like a cop-out. But your best bet (and quickest solution) at resolving this issue QuickBooks Desktop is to pick up the phone and chat with QuickBooks customer support.
It’s highly likely that something in your account setup is causing this issue in QuickBooks Desktop. And while you could follow this detailed guide to troubleshoot them all yourself, picking up the phone and chatting with a QuickBooks pro will save you plenty of time (and maybe even a few headaches).
You can contact QuickBooks customer support at (800) 446-8848.
 For more informative articles about office supplies, subscribe to our email newsletter!
Never fear, you won't begin receiving daily sales emails that belong in a spam folder. Instead, we promise a fun weekly roundup of our latest blog posts and great finds from across the web. And if you lose interest, it's always easy to unsubscribe with a single click.